Tuesday, November 02, 2010

Scorpio Hat pattern


Scorpio Hat


An easy hat that gives a little “twist” to the basic beanie. The deep ribbing makes for a fashionable look but doesn’t detract from the speed of the project. We Scorpios are often labeled as mysterious, but it’s no mystery why this hat is as fun to knit as it is to wear!

This project can be completed by advanced beginning knitters. You need to know how to cast on, knit, purl, bind off, and knit in the round. Experienced knitters can crank out a hat during a couple of movie nights or while zoning out in front of football all day on Sunday.

The perfect hat to knit and wear as October turns into November - or any time there is a chill in the air!


Materials
Approx. 150 yds. yards worsted yarn.
Your final yarn requirements will depend on whether you are making the hat for a child or an adult and how slouchy you like your hats.
One 16” circular US size 7 needle and one set US size 7 DPNs (or size to obtain gauge)
Tapestry needle
Four stitch markers

Abbreviations:
K = Knit
P = Purl
RT = Right twist. Knit the next two stitches together, leaving them both on the left-hand needle. Then, knit the first stitch again by itself. Slide the two sts to the right needle.
K2tog tbl = Knit next two stitches together through the back loops. If you prefer, you can substitute a SSK.
K2tog = Knit next two stitches together through the front loops.
Stockinette stitch = In the round, knit every row.

Gauge:
4.5 sts/inch in stockinette in the round.

Pattern Notes:

Twisted rib pattern (multiple of 3 sts):
Rows 1 & 2: *K2, P1*
Row 3: *RT, P1*

The rib is very stretchy and accommodating. I have quite the pumpkin head (22”), and the hat fits me just fine. It also works for my youngest daughter, who is only three years old.

Even though pattern is written for one size, it is easily adapted. Just keep in mind that the stitch total for the ribbing must be a multiple of three, and the stitch total for the body of the hat must be a multiple of four. You can adjust your stitch count between the ribbing and the body by increasing or decreasing in that first row of stockinette after the ribbing.


Knitting directions:

Using long-tail method, cast 81 stitches onto a circular needle. Place marker and join, being careful not to twist stitches.

Work in Twisted Rib for 3 inches (try 2.5 inches for kids), ending on Row 2.

Transition row: K2tog once, then knit around evently. 80 sts total.

Change to stockinette and work until length from cast-on edge measures 6 inches (try 5.25 inches for kids). If you prefer a slouchy hat, just knit this portion longer.


Decrease for top of hat:

Set-up row:
Slip beginning-of-round marker.
Then *K20, place marker.* Repeat to end of row.
You will now have four markers in your work.

Decrease as follows:
Row 1: *Slip marker, K2tog, K16, SSK*
8 stitches decreased
Row 2: K even

Repeat these two rows, switching to DPNs when neccessary, until 32 stitches remain. Then work Row 1 only, decreasing each round, until 8 stitches remain.

Break yarn and pull through remaining sts. Weave in ends, and enjoy!

Wednesday, August 23, 2006

Mira's Bath Mitt pattern

Mira's Bath Mitt

A cute and functional bath mitt, quick to knit in chenille. Makes a perfect gift - wrap it with a rubber ducky for a baby, tuck in some special soaps for a friend, or package with a spa gift certificate for Mother’s Day. Or, treat yourself!

This project can be completed by advanced beginning knitters. You need to know how to cast on, knit, purl, bind off, and knit in the round.

If you are a more experienced knitter, whip out several over the course of a week, and you’re set for holiday gifts!


Materials

200 yards Casco Bay Chenille (available from Halcyon Yarns) or other worsted weight chenille yarn

Yarn substitution note: The mitt uses much less than the full 200 yards of Casco Bay Chenille.

4 DPNs, US size 7/4.5 mm needle, or size to obtain gauge

Tapestry needle

Cotton or acrylic waste yarn

Abbreviations

K = Knit

P = Purl

SSK = Slip next two stitches as if to knit. Insert left needle into the front of these two stitches and and knit together through the back loops.

K2tog = Knit next two stiches together through the front loops.

CO = cast on

BO = bind off

PU = pick up stitch

Stockinette stitch = In the round, knit every row.

Gauge

4.5 sts/inch, but not critical for this project.

Pattern Notes

To make a bobble:

[K1, P1] twice into bobble stitch. Turn.

Purl 4. Turn.

Knit 4. Turn.

Purl 4. Turn.

Slip next 2 stitches as if to purl. K2tog. Pass two slipped stitches over, one at a time.

Mitten palm pattern:

Rows 1-3: Knit

Row 4: K2, [bobble, K2] 4 times, K18.

Rows 5-7: Knit

Row 8: K2, [K2, bobble] 4 times, K18.


Knitting directions

Using long-tail method, CO 30 distributed evenly over three DPNs. Join, being careful not to twist stitches. Your yarn tail marks the start of each round.

Work in K1,P1 rib for 10 rows.

Change to stockinette and work set-up row as follows: K10, M1, K10, M1, K10

Redistribute stitches as follows:

N1: 16

N2: 8

N3: 8

N1 holds the stitches for the palm of the mitten. Unlike a regular mitten where the pattern appears on the back or “outside” of the item, the bath mitt has the bobble pattern on the palm for maximum scrubbiness!

Work mitten palm pattern repeat once.

Work next 8 rows as follows:

Rows 1-3: Knit

Row 4: K2, [bobble, K2] 4 times, K18.

Row 5: Knit

Row 6: Using scrap yarn, K5. Slip these stitches back onto the left needle. Knit these stitches again with working yarn, and continue to work even to end of row.

Row 7: Knit

Row 8: K7, bobble, K2, bobble, K2, bobble, K18.

Work mitten palm pattern repeat 3 more times.

At this point, you may wish to try on the mitten to check the length. If you are knitting for a person who generally has larger hands, you may wish to work rows 1-4 again or even add an additional pattern repeat.

Decrease for top of mitten:

Row 1: Knit even.

Row 2: [K1, SSK, K10, K2tog, K1] twice

Row 3: Knit even.

Row 4: [K1, SSK, K8, K2tog, K1] twice

Row 5: Knit even.

Row 6: [K1, SSK, K6, K2tog, K1] twice

Row 7: Knit even.

Row 8: [K1, SSK, K4, K2tog, K1] twice

Arrange sts on two DPNs with 8 sts on each needle. Graft top of mitten closed using Kitchener stitch.

To work thumb

Unravel waste yarn and PU live sts. PU additional sts between top and bottom of thumb opening so for a total of 15 thumb sts, with 5 on each of 3 DPNs. Join and work in round. K until thumb measures 2” or desired length.

Decrease as follows:

Row 1: *K3, K2tog*

Row 2: K even

Row 3: *K2, K2tog*

Row 4: K even

Row 5: *K1, K2 tog*

Row 6: K even

Break yarn and pull through remaining sts. If you wish, you can add a loop at the cuff of the mitt so the user can hang it to dry.


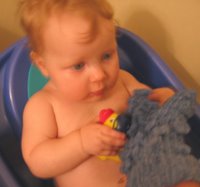
Mira says, "I love my bath mitt!"


Copyright notice: This pattern is provided free of charge but cannot be copied or redistributed in any form. This pattern may not be reproduced for sale and may not be used to produce garments for sale.

If you have any questions, please contact me at emily@giveitapurl.com - thanks for giving Mira's Bath Mitt a purl!